Conditions
Add IF / THEN / ELSE branching logic. Check order fields like total, country, SKU, or tags — then run different actions based on the result.
This page covers creating rules (from scratch or from a template), using the Flow Editor, and managing the rules you already have.
There are two ways to create a rule: start from scratch by picking a trigger, or start from a pre-built template.
Open the Rules page
Go to Automation > Rules from the sidebar.
Click ”+ New rule”
The New Rule dialog appears with available triggers.
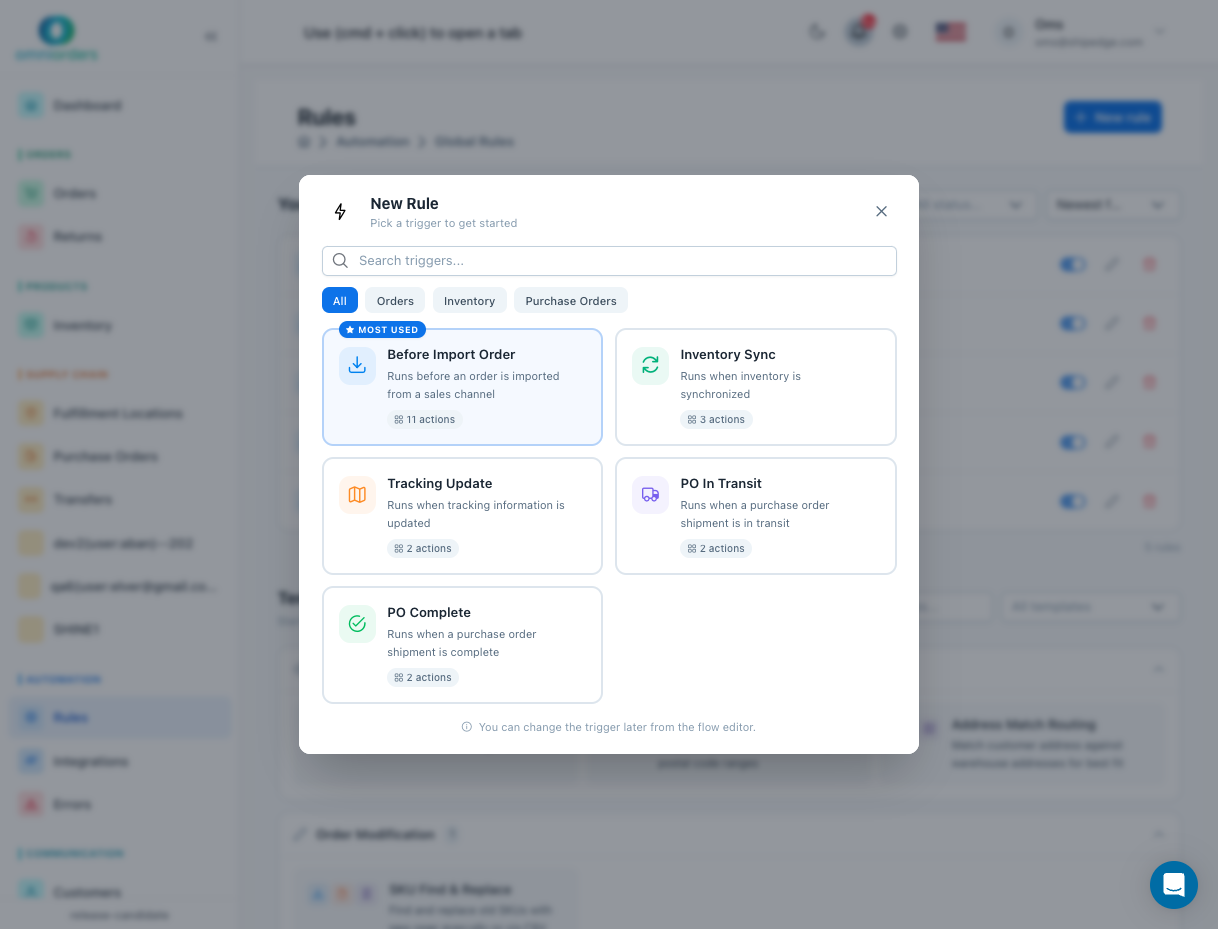
Pick a trigger
Choose the event that should start your rule. Use the category chips (All, Orders, Inventory, Purchase Orders) to filter triggers.
The most common trigger is Before Import Order, which runs before an order is imported from a sales channel and supports the widest range of actions.
Build your rule in the Flow Editor
The Flow Editor opens where you can add actions and conditions. See Using the Flow Editor below.
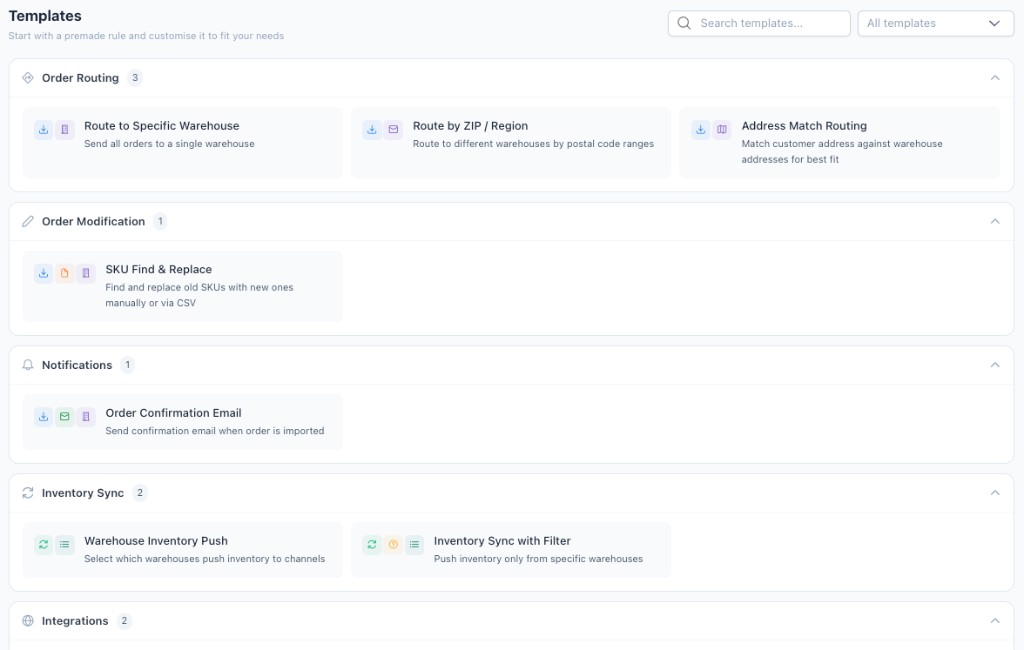
Scroll to the Templates section
On the Rules page, scroll down past “Your Rules” to see the Templates section.
Browse or search templates
Use the search bar or filter by category (All templates, Order Routing, Order Modification, etc.) to find a template that matches your use case.
Click a template card
A preview dialog opens showing the template steps, trigger type, and a description of what it does.
Click “Create Rule”
The Flow Editor opens with the template’s trigger and steps pre-configured. You can customize everything from there.
The Flow Editor is where you build and wire up your rule. It’s a drag-and-drop canvas with a sidebar of available actions on the left.
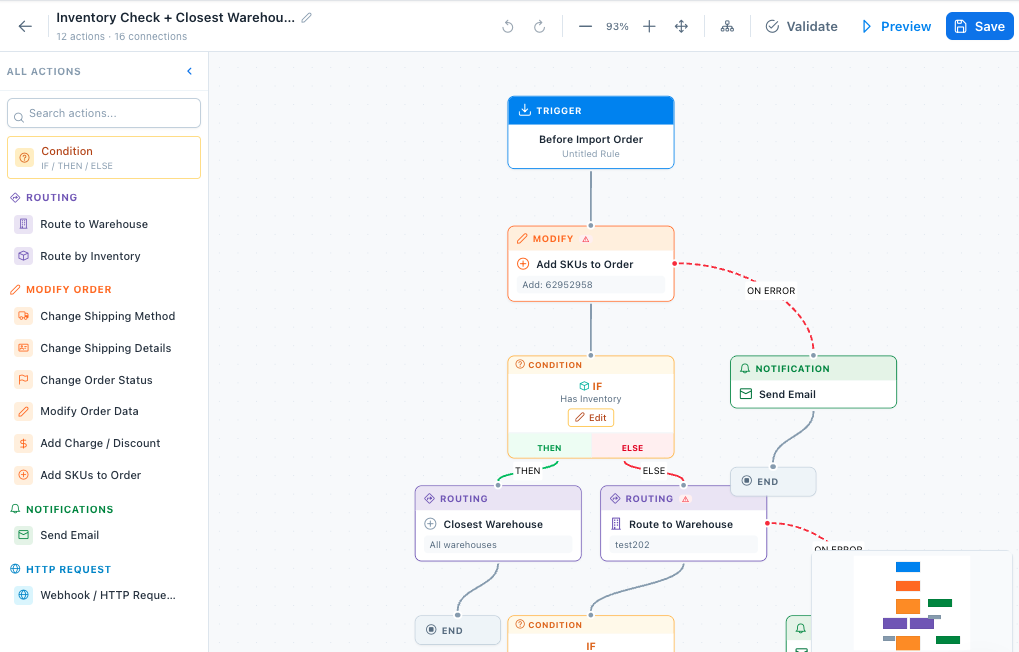
The editor has three main areas:
Actions in the sidebar are grouped by category:
Add IF / THEN / ELSE branching logic. Check order fields like total, country, SKU, or tags — then run different actions based on the result.
Route to Warehouse, Route by Inventory, Closest Warehouse, Route by ZIP Code, Route by SKU, and Address Match.
Change Shipping Method, Change Shipping Details, Change Order Status, Modify Order Data, Add Charge / Discount, Add SKUs to Order, and Find & Replace.
Send Email with customizable templates and recipients.
Webhook / HTTP Request to send data to external systems.
Select Warehouses to control which locations push inventory data to a sales channel.
Here’s what a more complex rule looks like in practice:
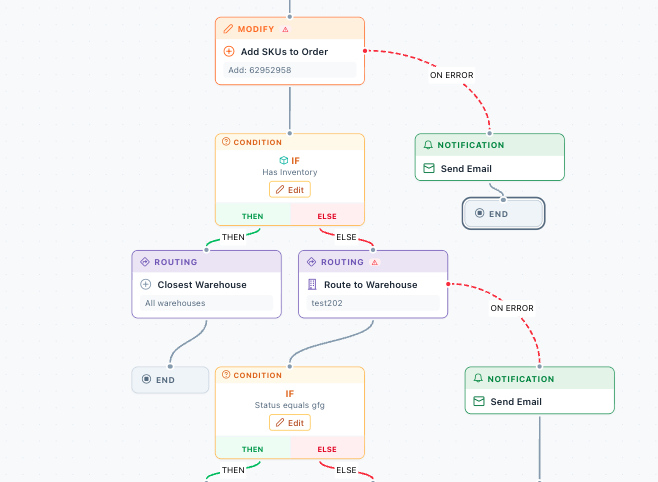
This rule adds SKUs to the order, then checks inventory. If stock exists, it routes to the closest warehouse; if not, it sends to a specific one. Error paths trigger email notifications. A second condition branch handles additional logic further down.
Add an action from the sidebar
Click any action in the sidebar to add it to the canvas, or drag it to a specific position.
Connect nodes
Drag from an output handle on one node to the input handle on the next. The connections set the execution order.
Configure each action
Click a node on the canvas to open its configuration panel. Fill in the required fields (e.g., select a warehouse for “Route to Warehouse”, enter email recipients for “Send Email”).
Add conditions (optional)
Click Condition in the sidebar to add IF / THEN / ELSE logic. Connect the THEN branch to one set of actions and the ELSE branch to another.
Validate your rule
Click Validate in the toolbar to check for errors. The editor will highlight any missing connections or configurations.
Preview your rule
Click Preview to simulate how your rule would process a sample order. Worth doing before you activate anything.
Save your rule
Click Save to save your rule. You can choose to:
| Control | Description |
|---|---|
| Rule name | Click the pencil icon next to the name to rename your rule |
| Undo / Redo | Reverse or replay your last changes (Ctrl+Z / Ctrl+Y) |
| Zoom controls | Zoom in, zoom out, or fit the entire flow to view |
| Auto-arrange | Automatically reposition all nodes for a clean layout |
| Validate | Check the flow for errors and missing configurations |
| Preview | Simulate the flow with sample data to verify the logic |
| Save | Save the rule and optionally activate it |
Each rule has a toggle switch on the right side of its card. Flip it to turn a rule on or off.
Click the pencil icon or click directly on the rule name/description to open it in the Flow Editor. Make your changes and click Save.
Click the trash icon on the rule card. You’ll get a confirmation dialog before anything is deleted.
Use the controls at the top of the “Your Rules” section:
The rule count at the bottom updates to show “Showing X of Y” when filters are active.
When multiple active rules share the same trigger, the primary rule runs first. That rule gets a “Default” badge in the list so you know which one takes priority.
One action per rule at first. Once it works, layer on conditions and extra actions.
Click Preview to test with sample data before turning a rule on. Catches config mistakes before they hit real orders.
“Route US orders to Miami warehouse” is better than “New Rule”. You’ll thank yourself when you have 20 rules in the list.
Save new rules disabled. Test with a sample order, then activate once it’s doing what you expect.
Use the Before Import Order trigger with a Route to Warehouse action. Select the destination warehouse in the action configuration.
Add a Condition node to check the customer’s state, ZIP code, or country. Connect different Route to Warehouse actions to the THEN and ELSE branches.
Use a Condition to check if the order total is above a threshold. If true, use Add SKUs to Order to insert a gift product, then route the order.
Add a Send Email action after the trigger. Configure the template, subject line, and recipients in the action panel.
Use the Inventory Sync trigger with a Select Warehouses action. Only the warehouses you select will push inventory to the sales channel.
Use the PO Complete or PO In Transit trigger with a Webhook / HTTP Request action. Configure the URL, headers, and the fields you want to send.
Make sure the rule is Active (green dot). Also check the trigger: “Before Import Order” only fires on sales channel imports, not manual order creation.
Click Validate in the Flow Editor. Usually it’s an unconnected node, an empty action config, or a missing warehouse selection.
The toggle won’t work if the rule is linked to an integration. Unlink it from Integrations first.
Delete is disabled when it’s the only rule for that trigger. Create another rule for the same trigger first, or just deactivate this one.
Related pages: