The Returns page gives you a complete view of all customer returns in your system. Track return requests, monitor their status, and manage the return process from start to finish with dedicated tools for both full shipment returns and individual product returns.
Returns Management centralizes every customer return in one place — from initial request through final processing. Create returns by shipment or individual SKU, filter by location, track each return’s status with clear indicators, and let inventory update automatically when returns are completed.
View all returns in one place with clear status indicators showing exactly where each return stands in the process.
Create returns by selecting entire shipments or individual products, giving you control over partial and full returns.
Filter returns by fulfillment location to see which warehouses are receiving returned items.
Click any return row to expand and see complete return information including items, quantities, and tracking details.
The Returns page displays all your returns in a table format with these key columns:
Items : Number of items in the return (displayed as count in parentheses)ID : Unique return identifier for trackingStatus : Current return status (open, completed, etc.)Fulfillment Locations : Where the returned items will be receivedReferences : Any reference numbers associated with the returnDate : When the return was created in the system
Use the All locations dropdown at the top of the page to:
View returns for all locations across your operation
Filter to a specific warehouse or fulfillment center
Focus on returns relevant to your current work
This helps teams manage returns for their specific locations without seeing returns destined for other warehouses.
Navigate to Returns
Click Returns in the sidebar menu under the Orders section.
Click New Return
Click the New Return button in the top right corner of the page.
Choose Your Return Method
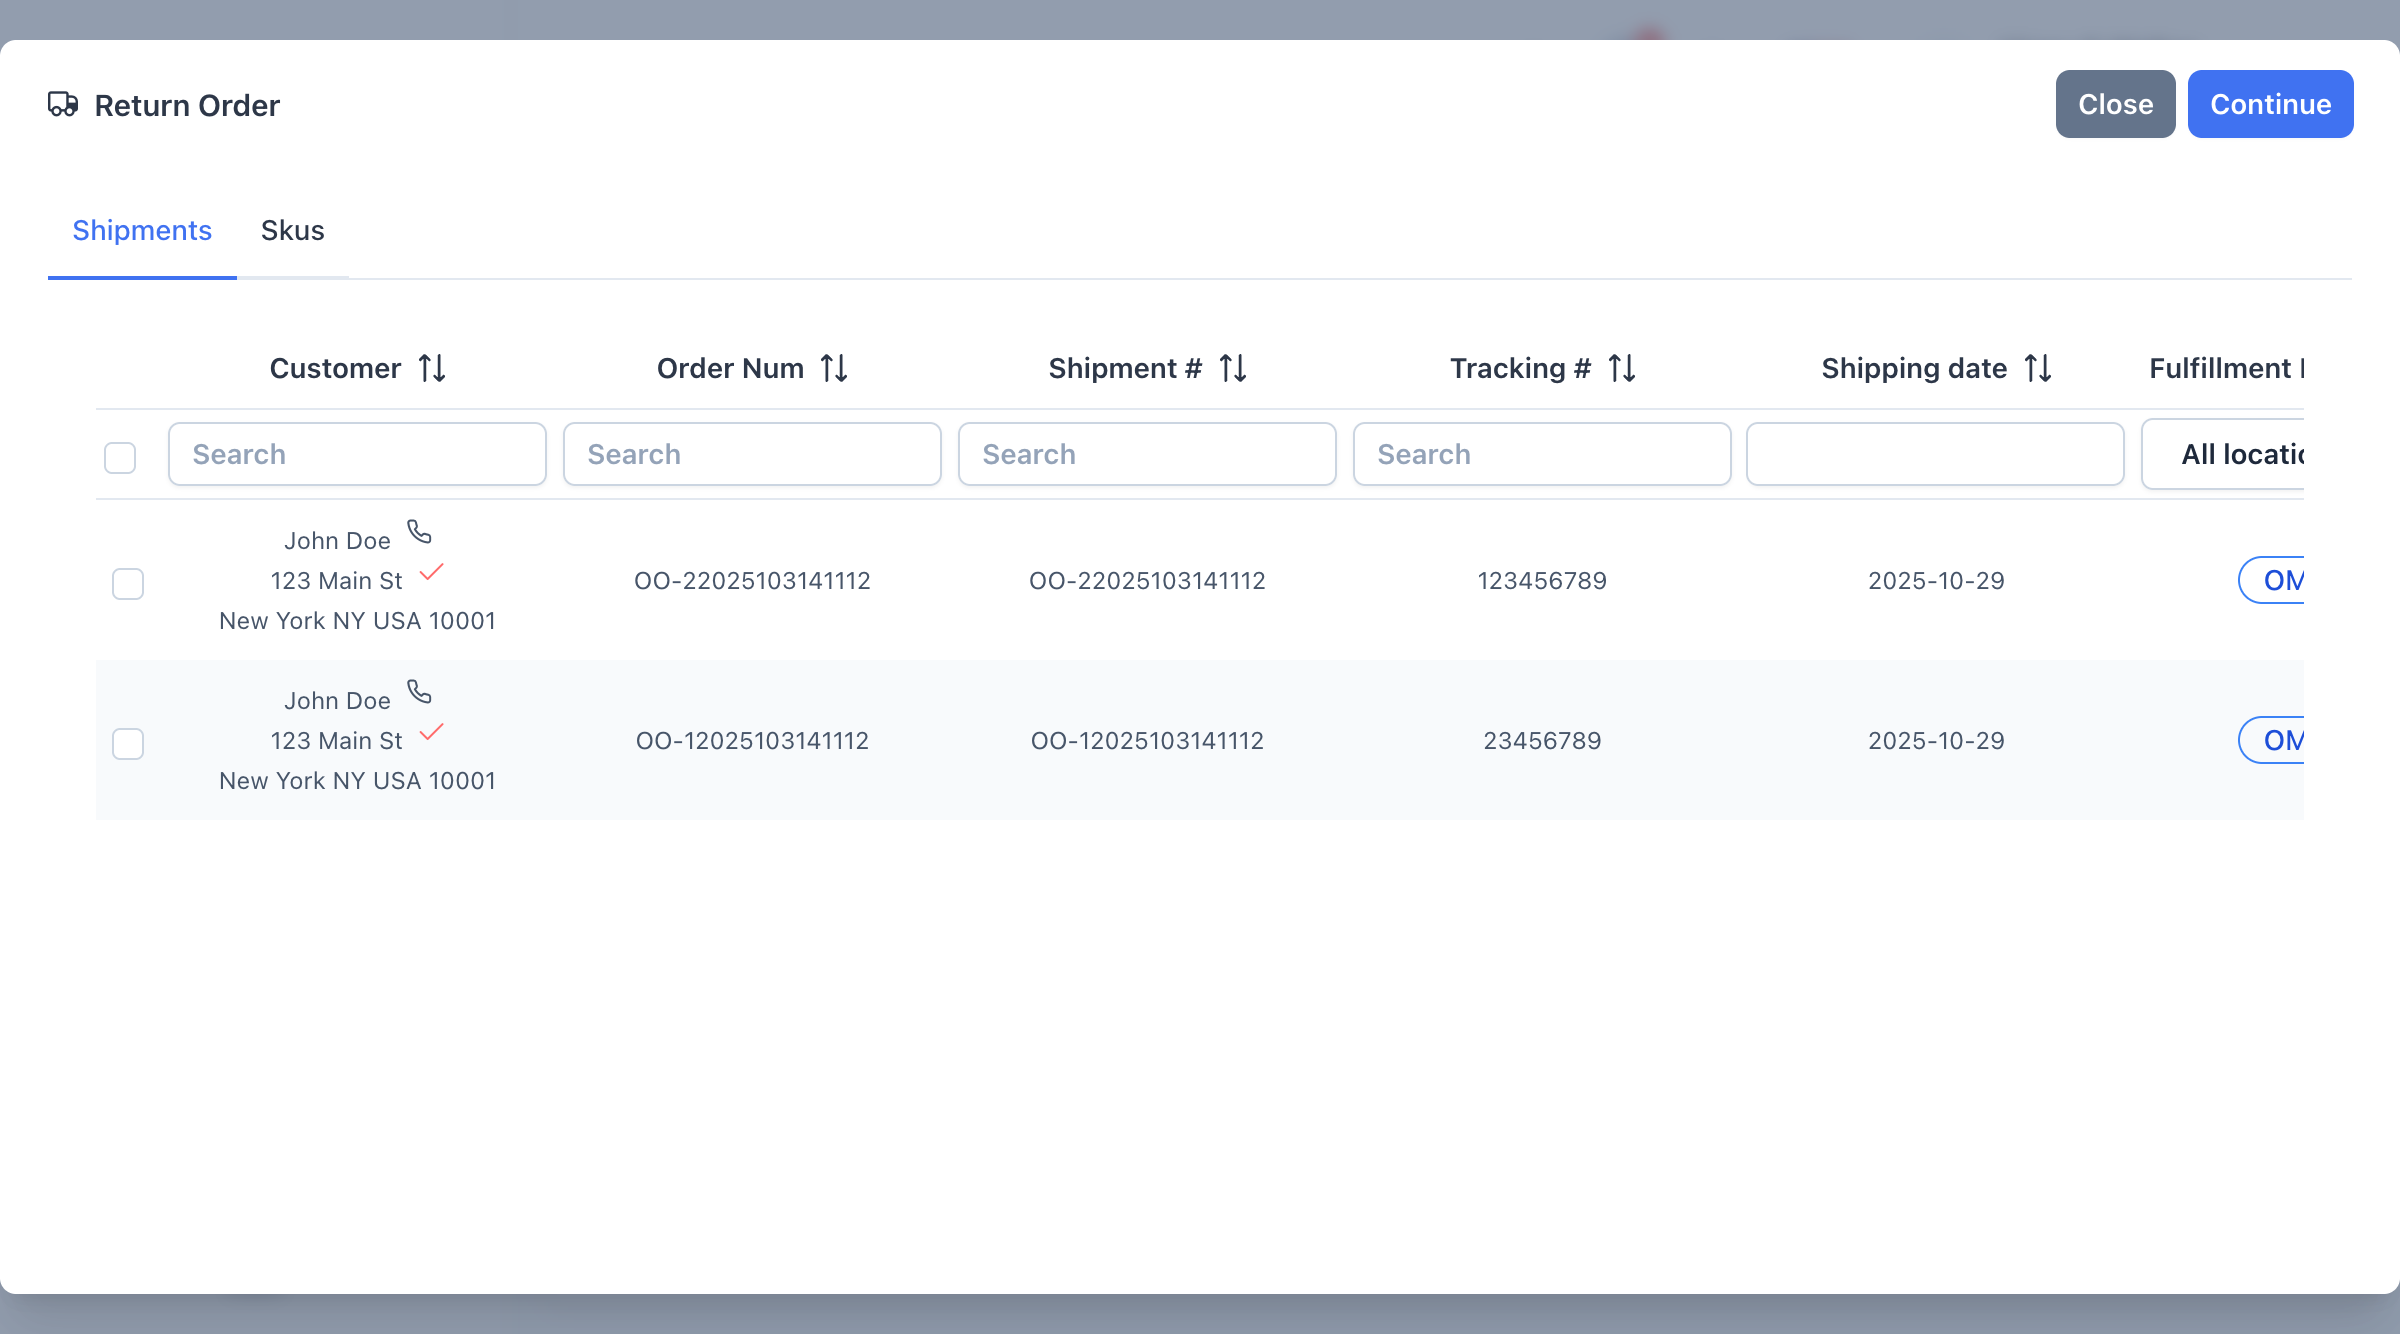
The Return Order dialog opens with two tabs:
Shipments Tab : Select entire shipments to return all items from specific ordersSkus Tab : Select individual products to return specific items from various orders
Select Items Using the Shipments Tab
If creating a return for a complete order:
Search for shipments by customer name, order number, shipment number, or tracking number
Use the search fields at the top of each column to filter results
Check the box next to each shipment you want to return
View shipment details including customer address, shipping date, carrier, and method
Choose this option when customers are returning everything from their order. This is the fastest method for full order returns.
Or Select Items Using the Skus Tab
If creating a return for specific products:
Switch to the Skus tab
Search by customer name, product name, or SKU
Check the box next to each product you want to include
See quantity information for each item
Click Continue
After selecting shipments or products:
Review your selections
Click Continue to proceed to the return details page
Or click Close to cancel and return to the Returns list
Complete Return Details
On the return details page:
Add the return date
Select the fulfillment location where items will be received
Choose the shipping method for the return
Add any notes about the return
Set quantities for good and damaged items
Save the Return
Click Save to create the return in the system.
Click the arrow icon next to any return to expand the row and see:
Individual items included in the return
Quantities being returned
Return shipment information
Additional return details
Use the filter controls to find specific returns:
ID Search : Enter a return ID number to find specific returnsStatus Filter : Select one or more statuses to filter the listLocation Filter : Choose a fulfillment location to see returns for that warehouseReferences Search : Look up returns by reference numbersDate Filter : Select a date range to see returns created during that period
Click the Columns button to:
Show or hide specific columns
Customize which information displays in your view
Save your preferred column layout
Available columns include:
Requested Date
Received Date
Processing Date
Customer Email
Country and Zip Code
Returns progress through different statuses as they move from request to completion:
Open : Return request has been created and is awaiting processingApproved : Return has been approved and customer can ship items backRejected : Return request was deniedIn Transit : Items are on their way back to your warehouseProcessing : Items have been received and are being inspectedDiscrepancy : There is a discrepancy in the return that needs to be resolvedCompleted : Return is complete and inventory has been updatedError : An error occurred during the return process
The status helps everyone understand exactly where each return stands in the process.
Click the filter icon next to the Columns button to:
Save frequently used filter combinations
Quickly apply saved filters to your view
Share filter setups with your team
Switch between different return views
This feature helps you quickly access the returns that matter most to your current task.
Filter by location when working with specific warehouses. This keeps your view focused and prevents confusion about which returns need attention.
Use the Shipments tab for full order returns and the Skus tab for partial returns. This saves time and reduces errors.
Click the arrow to expand return rows and see complete item information before taking action. This helps verify you’re working with the right return.
Update return statuses as returns progress through your warehouse. This keeps customers informed and your team aligned.
Add reference numbers like RMA numbers or case IDs to make returns easier to find and track across systems.
Double-check your shipment or product selections before clicking Continue. This prevents creating incorrect returns that need to be cancelled.
Verify the order was shipped (only shipped orders can be returned)
Check that you’re searching in the correct location filter
Try searching by different criteria (customer name, tracking number, etc.)
Clear any active filters that might be hiding results
Check the location filter - you might be viewing a different warehouse
Verify the return was saved successfully
Try clearing table filters to see all returns
Check the date range if using date filters
Expand the return row to verify the items included
If the return hasn’t been processed yet, you may be able to edit it
Contact your admin if you need to cancel and recreate the return
Use saved filters to group similar returns together
Sort by status to see all returns needing the same action
Expand multiple rows to review details before taking bulk actions
Learn More About:
Next Steps: Processing Returns